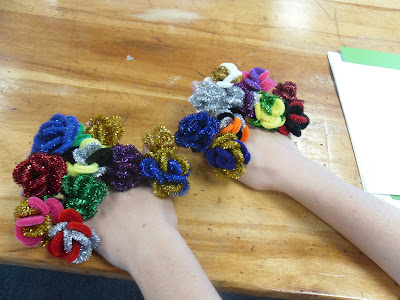
I attended the 2010 Missouri Girls State and these rings were everywhere. People walked around the halls just whipping them out. Being the little entrepreneur that I am, I saw the massive money making potential. After recovering from my 7 day immersion in government and politics I got into my moms stash of pipe cleaners. It took me about ten minutes but I emerged with what looked like a rose ring.
I was in love instantly. Within the next half hour, I depleted my moms stash and had about 30 rings sitting in front of me. The ladies at my moms scrapbook store fell in love. I started getting orders for special colors and sizes. Thus making me enter...MASS PRODUCTION MODE!
Then when I won the title of Miss Concordia Fall Festival I entered SUPER MASS PRODUCTION MODE!!! I sold over 300 rings in less than a week. Sure I only charged $1.00 a pop but it adds up. If you're looking to steal my brilliant idea...preferably outside the Kansas City/Warrensburg area...these sell very well at country fair type craft shows. They're lightweight, fun and allow the customer to bring home something fun without carrying a bag.
Alright enough with my story. Here's the tutorial!
Supplies Needed:
- 6 pipe cleaners for the petals, any color
- 2 green pipe cleaners, for the leaves (optional)
- A ring sizer (optional)
Step Two: Make the ring. You have to make the circle for the ring by making a loop with the twisted part of the pipe cleaner and twisting the top of the circle together. It'll end up like this.
Step Three: Bend the colored pipe cleaners up and the green ones down and out of the way. The leaves are the last step.
Step Four: Roll your first petal. You want to start at the very top and roll down keeping the petal flat and round. Then bend it to this position on the ring.
Step Five: Repeat this with three more pipe cleaners only positioning them as the four corners of the bottom of the flower.
Step Six: Next you'll use three more colored pipe cleaners making a triangle-esque shape on top of the four base petals. Then roll the last colored pipe cleaner to make the top.
Step Seven: Shape your flower too look like a nice rose. Finally use the same rolling technique on each green pipe cleaner keeping them on the bottom. The only difference it to pinch the end making a point on the leaf.
Ta-Dah!
That is the most basic rose. Feel free to experiment with different style of pipe cleaners and color combos.


0 comments:
Post a Comment